Have you ever wondered how those amazing Roblox animations are perfected before they reach your screens? The Roblox animation tester is an essential tool for developers and aspiring animators alike, offering a sandbox environment to meticulously review and refine character movements. This powerful feature allows creators to isolate, play, and adjust individual animation sequences, ensuring every jump, run, and emote looks flawless. Understanding how to effectively use this tool is key to creating immersive and engaging experiences on the platform. Many developers use it to catch subtle glitches or timing issues that might otherwise go unnoticed, significantly improving the quality of their games. This guide will navigate you through its functionalities, helping you master the art of animation testing in Roblox Studio. You will discover practical tips and tricks to streamline your workflow and elevate your animated creations to professional standards. Stay ahead in Roblox development by mastering this fundamental tool. This comprehensive overview is designed to empower both beginners and seasoned creators with the knowledge needed for successful animation integration.
Related games- Guide: Master Ashin Rouge Lineage Roblox Fast
- Epicenter Roblox Guide How to Master the Quake Zone
- Guide: Master Roblox Worlds 2026
- Guide Are Instant Gaming Keys Global Your Ultimate Guide
- Guide: Find Do It Again Roblox ID & Use It Effectively
When diving into Roblox development, many creators ask, "How do I perfect my character animations?" The Roblox Animation Tester is your go-to solution, a vital tool within Roblox Studio that empowers you to meticulously review and refine every movement. This isn't just a simple playback feature; it's a comprehensive environment designed for animators to isolate, play, and adjust individual animation sequences. Think of it as a dedicated rehearsal space for your digital characters, allowing you to catch subtle glitches, timing issues, or unnatural bends that might otherwise slip through. Mastering this tool is crucial for anyone aiming to create immersive and professional-grade experiences, ensuring your avatars move with unparalleled fluidity and realism. It streamlines your workflow, helps in debugging, and ultimately elevates the visual quality of your game. This ultimate living FAQ is updated for the latest patch, addressing common queries, offering practical tips, and guiding you through advanced techniques.
Most Asked Questions about Animation Tester Roblox
How do you test animations on Roblox?
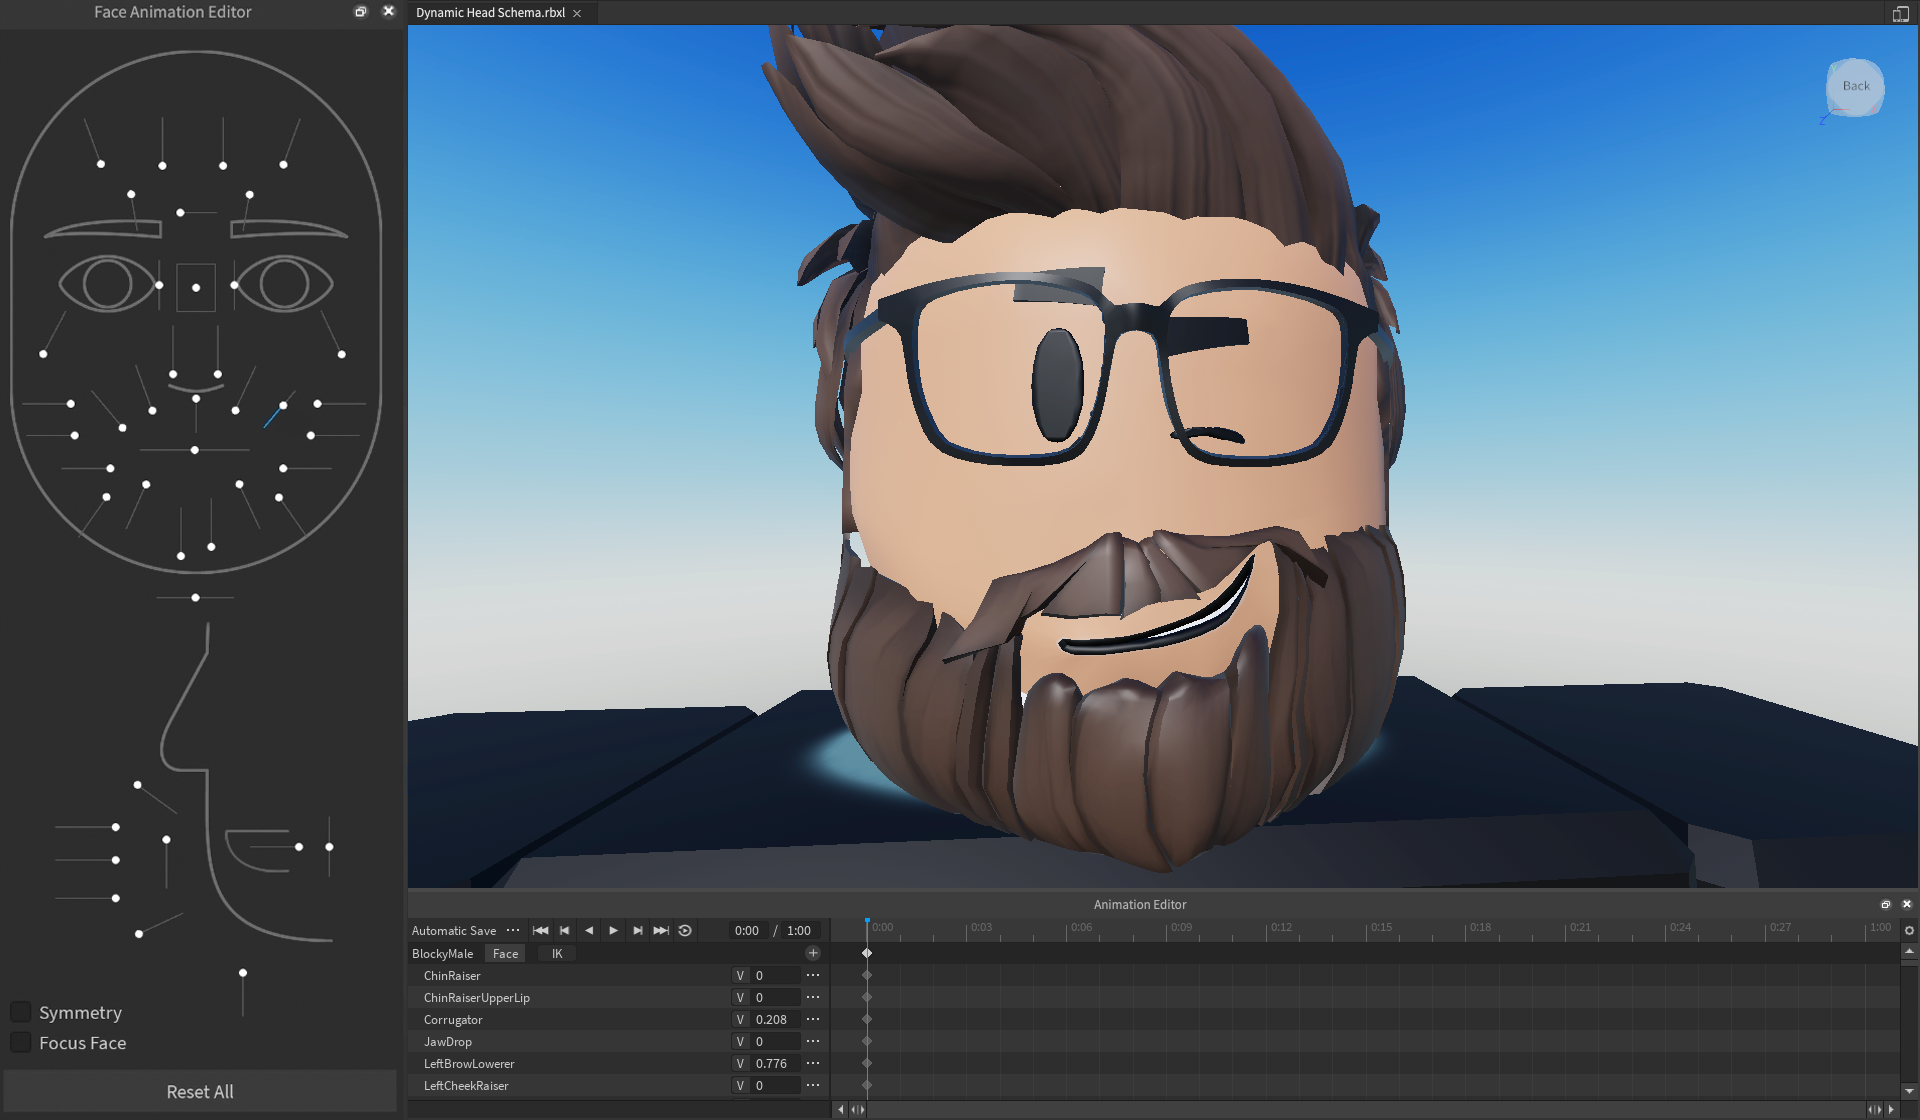
You test animations on Roblox primarily using the built-in Animation Editor within Roblox Studio. Load your character model into the workspace, open the Animation Editor from the Plugins tab, then import or create your animation. The editor provides playback controls, scrubbing, looping, and a timeline to review movements. You can assign the animation to your model and preview it in real-time, adjusting keyframes and priorities as needed. This allows for precise debugging and refinement before integrating into your game.
What is the Roblox Animation Editor?
The Roblox Animation Editor is a powerful native plugin in Roblox Studio designed for creating, editing, and testing character animations. It provides a visual interface with a timeline, keyframe manipulation, and controls for joint rotation and position. You can import models, create new animations, save them to Roblox, and immediately preview how they look on your character. It's the central hub for all animation development, offering tools to fine-tune every aspect of movement.
Why is my Roblox animation not playing?
If your Roblox animation isn't playing, several common issues could be at fault. Firstly, check the animation's priority; lower-priority animations can be overridden. Ensure the AnimationId is correct and the animation is properly loaded and played by a script. The character model must have a Humanoid and correctly configured Motor6D joints. Finally, confirm the animation is saved and published to Roblox, and that you have ownership or proper permissions for the asset. Debugging in the Animation Editor can help pinpoint specific errors.
How do I fix T-posing animations in Roblox?
T-posing in Roblox animations typically indicates a rigging or loading problem. Ensure your character model is correctly rigged with all necessary Motor6D joints properly connected and named. Verify that the animation itself is valid and not corrupted. Often, an animation playing at a lower priority than a default idle can cause a T-pose. Check your animation priority settings and ensure they are appropriate for the intended action. Sometimes, re-exporting the animation or re-rigging the model can resolve persistent T-posing issues.
Can I test character movements with custom rigs?
Yes, you can absolutely test character movements with custom rigs in Roblox Studio's Animation Editor. The key requirement is that your custom rig must be properly set up with a Humanoid and a hierarchy of Motor6D instances connecting its parts. If your custom character mimics the structure of an R6 or R15 avatar using these foundational components, the Animation Editor will recognize it, allowing you to create, apply, and test animations just as you would with standard Roblox avatars. Proper rigging is paramount for custom model animation.
What are some tips for optimizing Roblox animations?
Optimizing Roblox animations involves several key practices. Reduce unnecessary keyframes to minimize data processing without sacrificing quality. Keep animation durations efficient for their intended action. Reuse animation assets where possible instead of creating duplicates. Be mindful of animation priorities to prevent conflicting movements and ensure smooth blending. Test animations on various device types to catch performance bottlenecks. Finally, ensure your rig is efficient and not overly complex, as complex rigs can also impact performance during animation playback.
How do I preview animation blends in Roblox Studio?
Previewing animation blends in Roblox Studio typically involves scripting. While the Animation Editor focuses on single animations, you can write a simple LocalScript in a test environment to load and play multiple AnimationTracks simultaneously, adjusting their `Weight` and `FadeTime` properties. This allows you to observe how different animations transition and combine in real-time. Experiment with various priorities and crossfade settings within your script to achieve desired blending effects, using the built-in Studio playtest feature to visualize the results.
Beginner Questions
What are the basic controls for playing animations in the tester?
The basic controls for playing animations in the Animation Editor are straightforward. You'll find standard media player buttons: Play, Pause, Stop, and a timeline scrubber to navigate through frames. There's usually a loop toggle to make the animation repeat continuously. You can also adjust the playback speed to slow down or speed up the animation for more detailed analysis. These controls allow you to meticulously review every moment of your character's movement. Practice using them to become proficient in your animation workflow.
How do I import an existing animation into the Animation Editor?
To import an existing animation, first, have your character model selected in the Workspace. Open the Animation Editor from the Plugins tab. Click the '...' button (or similar 'Load' option) within the editor, and you'll typically be prompted to enter the AnimationId. Paste your animation's Asset ID, and the editor will load its keyframe data onto your selected model. Ensure the animation's rig type (R6/R15) matches your character. This method allows you to easily refine or inspect animations already published to Roblox.
Where do I save my animation after I’m happy with it?
Once you're satisfied with your animation in the editor, you'll need to save it. Within the Animation Editor, look for a 'File' menu or a '...' button. Choose 'Save' or 'Export' (sometimes 'Publish to Roblox'). This will upload your animation data to Roblox and provide you with an AnimationId, which is a unique number you'll use in your game scripts to play the animation. Always remember to save and retrieve this ID; it's essential for utilizing your animation in-game.
What is a keyframe in animation?
A keyframe in animation marks a specific point in time where you define a character's pose, position, or rotation. The Animation Editor then interpolates, or smoothly transitions, the character's movement between these keyframes. It's like drawing the most important poses, and the computer fills in the in-between frames. Understanding keyframes is fundamental to controlling the flow and timing of your animations, allowing you to create dynamic and expressive movements with precision.
Tips & Tricks
How can I make my character animations look more natural?
To make character animations more natural, focus on subtle details and organic movement. Utilize easing styles in your keyframes to create smooth accelerations and decelerations rather than abrupt stops and starts. Incorporate secondary actions or subtle idle movements to add life, even when the character is static. Pay attention to weight distribution and follow-through in movements. Observe real-life motion for inspiration, and don't be afraid to exaggerate slightly to convey emotion or impact. Consistent practice and critical observation are key.
What are good practices for naming animations for clarity?
Good practices for naming animations are crucial for organization, especially in team projects. Use a consistent, descriptive naming convention. For example, 'CharacterName_Action_Variant_Priority' (e.g., 'Knight_Walk_Heavy_Movement'). Include the character or object it applies to, the specific action it performs, any variations, and sometimes even its priority. Avoid generic names like 'Anim1' or 'Walk' if you have multiple walk cycles. Clear names make animations easy to find, understand, and manage, significantly improving workflow and reducing errors.
How do I use Onion Skinning to refine animation transitions?
Onion skinning is a visual aid that shows translucent 'ghosts' of previous and next keyframes around your current frame. To use it, look for an 'Onion Skinning' option, usually in the Animation Editor's toolbar or settings. Activating it helps you visualize the flow of motion between frames, making it easier to spot jerky movements or inconsistent spacing. It's invaluable for smoothing out transitions, ensuring arcs are fluid, and maintaining consistent character volume. If your editor doesn't have it, look for a third-party plugin that does; it's a huge time-saver.
Bugs & Fixes
My animation looks different in-game compared to the editor. Why?
If your animation looks different in-game than in the editor, it's a common and often frustrating issue. The primary culprits are usually animation priorities, conflicting scripts, or network latency. Ensure your animation's priority (e.g., Action, Movement) is correctly set to override other animations. Check for other scripts in your game that might be trying to manipulate the same body parts or playing their own animations. Sometimes, slight discrepancies can occur due to how the game engine handles physics or network replication, especially with very fast or complex movements. Test in a live game environment to replicate the issue accurately.
How to troubleshoot animation flickering or popping?
Animation flickering or popping often points to issues with blending, conflicting animations, or occasionally, a corrupt animation asset. First, check for overlapping animations with similar priorities that might be fighting for control. Adjusting the `FadeTime` in your script when playing animations can create smoother transitions and prevent sudden pops. Verify that all keyframes are properly set and that there are no drastic, unintended changes between adjacent frames. If the issue persists, try re-exporting the animation or even recreating a small segment to isolate the problem. Sometimes, it's a very subtle glitch in the keyframe data that needs to be manually ironed out.
Endgame Grind
What are advanced considerations for character locomotion systems?
Advanced character locomotion systems go far beyond simple walk/run cycles. They consider blending between numerous states (idle, walk, run, sprint, jump, fall, strafe, combat moves) based on player input, environmental factors, and character state. Key considerations include complex state machines, inverse kinematics (IK) for foot planting and hand placement, procedural animation overlays (like breathing or head look-at), and dynamic animation speeds. The animation tester is used to meticulously check transitions between these complex states, ensuring seamless and responsive movement that feels natural under various conditions. It’s about creating a truly immersive and believable character experience.
How can I use the Animation Tester for user experience (UX) refinement?
Using the Animation Tester for UX refinement is about ensuring animations enhance player engagement and clarity. For example, does a 'hit' animation clearly convey damage? Does a 'pickup' animation intuitively show the item being acquired? Test animations for responsiveness – do player inputs feel immediate, or is there an irritating delay? Pay attention to visual cues, making sure animations communicate important game states (e.g., low health, charging ability) effectively without being overly distracting. The tester helps you confirm that your animations not only look good but also *feel* good and contribute positively to the overall player experience, guiding the player intuitively through actions and feedback.
Still have questions? Check out our popular related guides on 'Mastering Roblox Rigging' or 'Scripting Advanced Character Animations' for more in-depth knowledge!
Ever wondered how those amazing Roblox animations come to life so smoothly, or perhaps asked, "How do Roblox developers test their animations before launch to ensure they're perfect?" It's a question many curious creators ponder, and the answer often lies in the powerful yet often underestimated Roblox animation tester. This isn't just a simple playback button; it's a dedicated environment allowing developers to fine-tune every subtle twitch and grand gesture, ensuring their characters move with purpose and precision. Think of it as your virtual rehearsal stage for all things animated, where every movement can be scrutinized and polished. Mastering this tool is a game-changer for anyone serious about creating engaging Roblox experiences, transforming raw motion data into fluid, captivating visual stories for players. Understanding its full potential is crucial for any animator on the platform.
The journey to perfect character movement in Roblox begins long before you hit play in the animation tester. Developers effectively use
Roblox animation tools
to create dynamic character movements, shaping how every avatar interacts with the virtual world. These robust tools are designed for intuitive creation, allowing you to sculpt intricate sequences with ease and precision. It's not just about making things move; it's about making them feel alive and responsive, truly breathing life into static models. Before diving into testing, you're setting the very foundation for your animated masterpiece within Roblox Studio.Why is
rigging Roblox characters
a foundational step before animation testing can even begin? Proper rigging ensures that your character's joints bend naturally and smoothly, preventing awkward or broken movements during playback that can shatter player immersion. This critical initial setup directly impacts the quality of your final animation, serving as the skeletal framework for all subsequent movements. Without a well-rigged model, even the most expertly crafted animation will fall flat, demonstrating the importance of this preliminary stage.Where does
animation debugging
fit into the typical Roblox development workflow? Identifying and fixing glitches or unexpected behaviors during the animation testing phase saves countless hours later in the project, before your game goes live to millions of players. It's about refining movements until they are flawless and expressive, eliminating any jankiness or unintended motion. Early and thorough debugging ensures a polished player experience, making it an indispensable part of the development cycle for any serious Roblox creator.How does an
animation tester roblox
contribute toperformance optimization Roblox
experiences for all players? Efficient animations run smoothly without causing lag, making the game more enjoyable and accessible for everyone, even on lower-end devices. Testing helps ensure that detailed movements don't unnecessarily burden the game's resources, which can severely impact framerates. By optimizing animations during the testing phase, developers can deliver a seamless and engaging experience across the diverse Roblox user base, preventing frustrating slowdowns.What
community animation resources
are available for aspiring Roblox animators and testers looking to improve their skills and expand their toolkit? Tapping into the vast network of tutorials, forums, and pre-made assets can significantly accelerate learning and development, providing solutions to common animation challenges. These resources offer invaluable insights and practical solutions for common challenges, fostering growth and collaboration within the creative community. Leveraging these shared knowledge bases is a smart move for any animator aiming to refine their craft.Beginner / Core Concepts
1. Q: What exactly is the Roblox Animation Tester, and why should I care about using it for my game?
A: Oh, I get why this confuses so many people when they first jump into Roblox Studio! The Roblox Animation Tester isn't just a fancy button; it's your personal sandbox for dissecting and perfecting every character movement you create. Essentially, it's a dedicated plugin or feature within Studio that lets you load any animation, play it back, scrub through frames, and even tweak its properties on the fly. You should absolutely care about it because it's the ultimate tool for spotting those tiny hitches, weird bends, or timing issues that can make an otherwise awesome animation feel clunky. It helps you ensure your characters look professional and move fluidly, making your game feel way more polished. Using it means you're creating a better experience for your players, and honestly, it saves you a ton of headaches down the line during debugging. It's like a director watching dailies, but for your digital actors. You've got this!
2. Q: How do I even open and start using the Animation Tester in Roblox Studio for the first time? It seems a bit hidden.
A: This one used to trip me up too when I was starting out! It's actually not hidden once you know where to look. To open the Animation Tester, you'll first need to open Roblox Studio and have a place or game loaded. Then, head up to the 'Plugins' tab in the top menu bar. There, you'll usually find an option called 'Animation Editor' or sometimes an 'Animation Test' button if you have a specific plugin installed. The built-in Animation Editor often serves this primary testing purpose, allowing you to load an animation, attach it to a character model in your workspace, and then play it back. If you don't see it, a quick search in the Roblox Plugin Marketplace for 'Animation Editor' will get you the official one or a community-favorite alternative. Just make sure your character model is properly rigged, or you won't have much to test! Try this tomorrow and let me know how it goes.
3. Q: What's the difference between testing an animation in the Animation Editor versus just running my game in Studio?
A: That's a super smart question, and it highlights a key distinction for efficient development! When you test an animation directly in the Animation Editor or a dedicated Animation Tester, you're in a controlled, isolated environment. You can loop specific sections, slow it down, or speed it up without any game scripts, player input, or environmental factors interfering. It's pure, focused animation review. Running your game in Studio, on the other hand, tests the animation within the full context of your game, including all scripts, physics, and player interactions. This is crucial for seeing how the animation behaves 'in the wild' but can make it harder to pinpoint specific animation issues if other game systems are at play. Think of the tester as a microscope for your animation, and running the game as a full-body check-up. Both are essential, but for different stages of refinement. Keep pushing those pixels!
4. Q: Can I test animations on custom character models, or does it only work with default Roblox R6 or R15 rigs?
A: Absolutely, you can test animations on custom character models! This is where the Roblox Animation Tester truly shines for creators building unique experiences. The key, however, is that your custom character model needs to be properly rigged with a humanoid and a clear hierarchy of Motor6Ds. If your custom model has a well-defined R6 or R15-like structure with correctly named parts and joints, the Animation Editor (and by extension, the tester) will recognize it and allow you to apply and test animations just as you would with a default avatar. It's all about that underlying skeletal structure. So, if you've got a fantastic custom creature or mech, rig it right, and you'll be able to animate and test it with ease. Don't be afraid to experiment with your unique designs!
Intermediate / Practical & Production
1. Q: How can I effectively debug animation glitches like 'T-posing' or unnatural joint bending using the tester?
A: Ugh, the dreaded T-pose or weird bends – I get why this frustrates so many people, it's like your character is rebelling! The animation tester is your best friend here. First, load the animation onto the problematic character in the editor. Scrub through the animation frame by frame. Often, a T-pose indicates a rigging issue (missing or incorrectly named Motor6Ds) or an animation priority problem. Check your animation's priority (idle, movement, action, core) to ensure it's high enough to override default poses. For unnatural bending, it's usually a rigging weight issue or a constraint problem. Look at the specific joint that's bending incorrectly. Is it weighted properly to its parent bone? Sometimes, simply re-exporting the animation or re-rigging the specific limb can solve it. Also, consider if there are any conflicting scripts trying to manipulate the same limb. Isolate the animation, review the rig, and check for script interference. You'll nail it!
2. Q: What are animation priorities, and how do they impact what I see when testing animations in Roblox?
A: This is a crucial concept that used to totally trip me up when I started, but it's super important for smooth animation blending. Animation priorities in Roblox tell the engine which animation should take precedence when multiple animations try to play on the same character part simultaneously. There are four main priorities: Core, Idle, Movement, and Action (from lowest to highest). When you're testing, if your custom animation doesn't play or gets overridden, it's often because its priority is set too low. For example, a 'walk' animation (Movement priority) will naturally override an 'idle' animation (Idle priority). If your 'attack' animation (which should be 'Action' priority) is set to 'Movement,' it might not play correctly over a running animation. Always set the priority appropriate for the animation's purpose. The tester lets you quickly check and adjust these priorities to see their immediate effect, ensuring your animations layer and blend correctly. It's all about hierarchy, and once you get it, you'll see a massive improvement in your character's natural movements. You've got this!
3. Q: How can I test multiple animations in sequence or blend them together using the Animation Tester?
A: Blending animations is where things get really dynamic, and while the core Animation Editor focuses on single-animation creation, you can absolutely simulate and test blending within Studio. To test sequences, you'll typically need to use a simple local script in a test place. Create an AnimationController in your character model, load your animations into Animation objects, and use a script to play them one after another with `AnimationTrack:Play()` and `AnimationTrack:Stop()`. For blending, you'll often adjust the `Weight` property of `AnimationTrack:Play()` or manage different animation priorities (as we just discussed!). The Animation Editor itself has a 'timeline' view that can show you multiple keyframes, but for true dynamic blending, you're moving into scripting territory. Use the tester to perfect each individual animation, then use simple scripts to experiment with their interplay and blending curves in a controlled environment. It’s like choreographing a dance, piece by piece, then putting it all together! Keep practicing!
4. Q: What are some common pitfalls or mistakes developers make when using the animation tester, and how can I avoid them?
A: Oh man, I’ve seen – and made – pretty much every mistake in the book when it comes to animation testing, so I totally get why this is a concern! A huge pitfall is not having a properly rigged character; if your Motor6Ds aren't set up correctly, your animations will just look broken or won't play at all. Another common one is forgetting about animation priorities; if your custom animation isn't playing, chances are another default or lower-priority animation is overriding it. Always check your animation’s priority settings! Developers also sometimes forget to actually save and export their animations *after* making changes in the editor, leading to them testing an outdated version. Lastly, don't just test on one avatar type (like R15) if your game uses both R6 and R15; always test on all relevant character types. To avoid these, always double-check your rigging, confirm animation priorities, save and export diligently, and test broadly. You'll save yourself so much future frustration, trust me!
5. Q: How can I ensure my animations are optimized for performance after I'm done testing them?
A: That's a super important consideration, and I get why performance optimization Roblox is on your mind – nobody likes lag! Once you're happy with how your animations look in the tester, there are a few things you can do. First, keep your keyframe count reasonable; don't add unnecessary keyframes if the movement can be achieved with fewer. The more data the engine has to process, the more resources it uses. Second, ensure your animations aren't excessively long for simple actions. A quick punch shouldn't be a 5-second animation. Third, be mindful of how many unique animation assets you're loading at once; can any be reused or repurposed? Lastly, and this is subtle, consider the complexity of the rig itself. Highly complex custom rigs with many tiny parts might have a slightly higher overhead. While the animation tester itself doesn't 'optimize' directly, it gives you the visual feedback to make informed decisions about your animation's efficiency. Focus on clean, efficient movements in the editor, and you'll be well on your way to optimized performance. Keep those frame rates high!
6. Q: Are there any third-party plugins or community tools that enhance the Roblox animation testing experience?
A: Oh absolutely, the Roblox community is a treasure trove of innovation, and there are definitely some fantastic third-party plugins that can enhance your animation testing experience! While the built-in Animation Editor is robust, plugins often add quality-of-life features or specialized functionalities. For instance, some plugins offer more advanced Onion Skinning features, allowing you to see previous and next frames more clearly, which is incredibly helpful for smoothing out transitions. Others might provide more granular control over playback speeds, or even utilities to easily swap out animation IDs on a character without constantly going into scripts. Searching the Roblox Creator Marketplace for terms like 'Animation Plugin,' 'Rigging Tools,' or 'Animation Utility' often reveals some real gems that the community swears by. Always check reviews and update dates, though, to ensure they're well-maintained and compatible with the latest Studio versions. Tapping into community animation resources can seriously level up your workflow. Go explore what's out there – you might find your new favorite tool!
Advanced / Research & Frontier
1. Q: How do professional Roblox developers integrate the animation tester into a continuous integration/delivery (CI/CD) pipeline?
A: This is definitely a next-level question, and I get why this concept can feel a bit abstract for individual creators! Professional Roblox developers, especially those working in teams, integrate the animation tester not as a manual 'tool' in a CI/CD pipeline, but rather by incorporating *automated checks* for animation health. Instead of a human manually testing every animation change, they'll often have scripts that check for things like animation data integrity, valid AnimationIds, and even basic playback functionality without errors. While you can't literally 'run' the visual tester in a CI/CD script, the pipeline might include steps that build and run a small, dedicated Studio server where a headless client loads and attempts to play all new or modified animations. If an animation fails to load, errors out, or creates a T-pose in this automated environment, the CI/CD pipeline flags it. This ensures that only functional and correctly configured animations make it into the main build, catching issues early without manual intervention. It's about proactive quality control at scale. Pretty cool, right?
2. Q: What advanced techniques can I use to diagnose subtle animation blending issues that aren't immediately obvious?
A: Subtle blending issues can be notoriously tricky, and I get why they drive animators nuts – it’s like a tiny visual itch you can’t quite scratch! When the obvious T-poses are gone, but movements still feel a bit off, you need to get surgical. First, use a dedicated animation debugging plugin if available; some offer overlay visualizations of joint rotations and CFrame data, which can highlight conflicts. Second, experiment with very slow playback speeds in the tester or editor. Scrubbing frame by frame can reveal micro-hesitations or unnatural accelerations that blend too aggressively or too weakly. Third, pay close attention to the `Weight` property of your `AnimationTrack:Play()` calls in scripts. If you’re blending animations, ensure the weights add up correctly and that one animation isn’t instantly snapping another out of existence. Sometimes, it’s about having a slight overlap with a crossfade. Lastly, consider the 'snap' vs. 'smooth' transitions. Is the problem a sudden pop or a janky transition? Often, adjusting the transition time or easing style between animations in your script is key. It’s like being a digital chiropractor for your characters! Keep at it, you'll spot it.
3. Q: How do large-scale Roblox experiences manage and test hundreds or thousands of animations efficiently?
A: Managing and testing thousands of animations efficiently for a large-scale Roblox experience is a monumental task, and honestly, it requires a robust strategy. It’s not just about the animation tester anymore; it becomes a full-fledged asset management challenge. They often use a centralized animation library, perhaps a dedicated folder within their game's asset hierarchy, where all animations are stored and version-controlled. Tools are built to quickly preview animations by ID, allowing developers to search and test specific sequences without sifting through countless files. More advanced teams implement custom in-game animation viewers, which are essentially simplified animation testers accessible during runtime for rapid iteration. They also heavily rely on strict naming conventions and tagging systems for animations (e.g., 'CharacterName_Action_Variant') to make them easily searchable and categorizeable. This systematic approach, combined with selective testing and automated checks (as we discussed with CI/CD), helps keep the animation pipeline flowing smoothly even with massive asset counts. It's like running a massive library where every book is instantly retrievable and verified. Smart stuff!
4. Q: What are the best practices for using the animation tester when collaborating with a team of animators?
A: Collaborating on animations with a team adds a whole new layer of complexity, but the animation tester remains a critical component. Best practices start with clear communication and consistent workflows. First, establish strict naming conventions for all animations and animation files – this avoids confusion and overwriting. Second, use a shared version control system (like Git with Rojo) for all animation assets, ensuring everyone is working on the latest version and changes are tracked. When using the tester, each animator should test their animations on the *exact same base rig* that the game uses to avoid discrepancies. Regularly perform 'integration tests' where animations from different team members are combined and tested together to catch blending issues or priority conflicts early. Finally, provide constructive, specific feedback using the tester. Instead of just saying 'it looks weird,' use the tester's playback controls to pinpoint the exact frame or movement that needs adjustment. It's all about making sure everyone is on the same page and working towards a unified vision. You've got this collaborative spirit!
5. Q: Can the animation tester be used to analyze existing Roblox game animations for learning purposes?
A: This is a fantastic question and absolutely, YES! The animation tester, or more broadly, the Animation Editor within Roblox Studio, is an incredibly powerful tool for reverse-engineering and learning from existing animations. While you can't usually load animations *directly* from a published game unless they're uncopylocked assets, you can observe how they function. What you *can* do, however, is open up uncopylocked games or models from the Creator Marketplace. If those assets contain animations, you can load the character model into your own Studio session, find the Animation objects within it, and then load those AnimationIds into your Animation Editor. This allows you to dissect the keyframes, timing, and structure of how other talented creators achieve their effects. It's an invaluable learning resource! You can study their use of easing styles, understand their keyframe density, and see how they handle complex movements. It’s like peeking behind the curtain of a magic show – you get to see how the tricks are done, which is an amazing way to learn and improve your own craft. Go be a digital detective and learn from the best!
Quick Human-Friendly Cheat-Sheet for This Topic
- Always start with a well-rigged character; your animation is only as good as its foundation.
- Check your animation's priority (Core, Idle, Movement, Action) if it's not playing correctly; it's a common culprit!
- Use the Animation Editor's scrubbing and slow-motion features to spot subtle glitches and refine movements.
- Don't forget to save and export your animation *after* making changes; otherwise, you'll be testing old versions!
- Test on all relevant character types (R6, R15, custom) that your game supports to ensure broad compatibility.
- Experiment with different animation weights and crossfades in simple scripts to understand blending dynamics.
- Leverage community animation resources and plugins; they can seriously boost your workflow and knowledge.
Animation Tester Roblox Explained; Master Roblox Animation Tools; Rigging Characters for Animation; Debugging Roblox Animations; Performance Optimization Tips; Community Animation Resources; Creating Smooth Roblox Movements.
35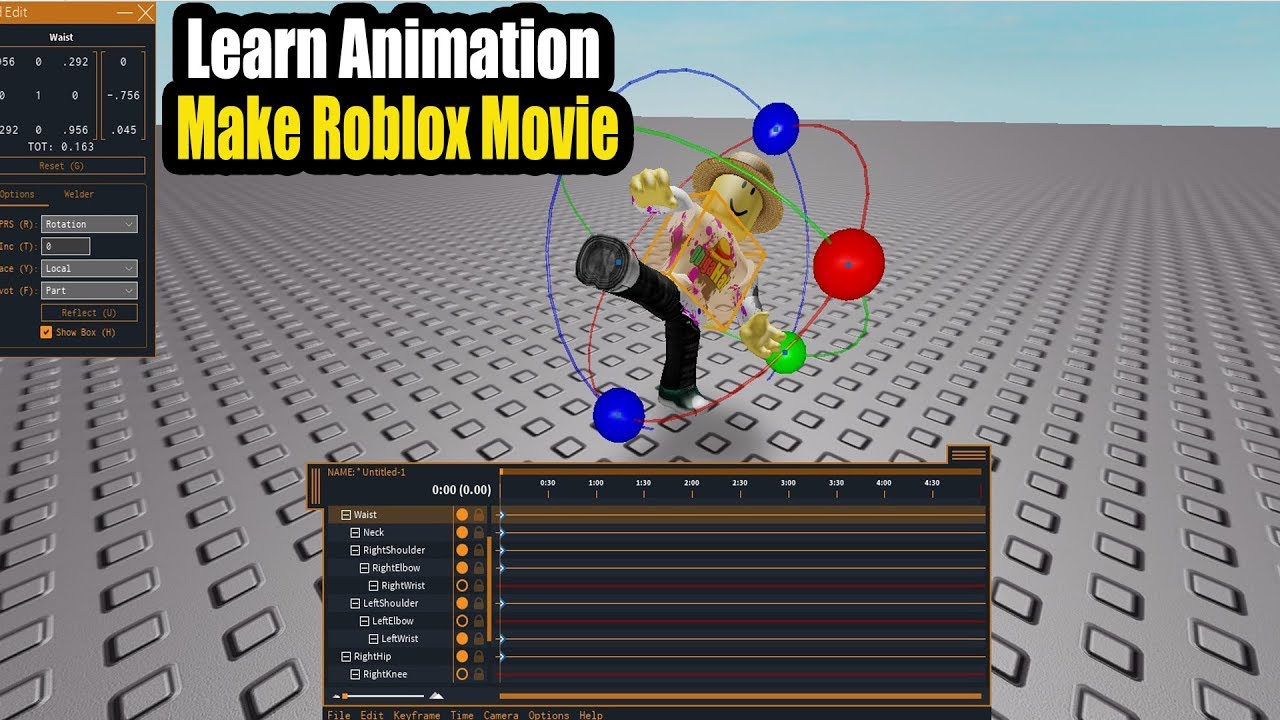


Roblox Animation Test Youtube . Animation Tester Play On Roblox NoFilter. COMMUNAUT Testeur D Animation Roblox NoFilter. Roblox Animation Test YouTube . Oldschool Animation Animation Tester R15 Para ROBLOX Jogo Download Oldschool Animation Animation Tester R15 Screenshot


Animation Tester Roblox Game Rolimon S NoFilter. Test Animation C Ng RTXSTUDIO20 Duy Th Nh Roblox YouTube Oar2 . Animation Test The Flash ROBLOX PROTOTYPE YouTube . Expressive Body And Face Animations Overview . Studio Animation Editor Now Supports Keyframe 2 1024x586
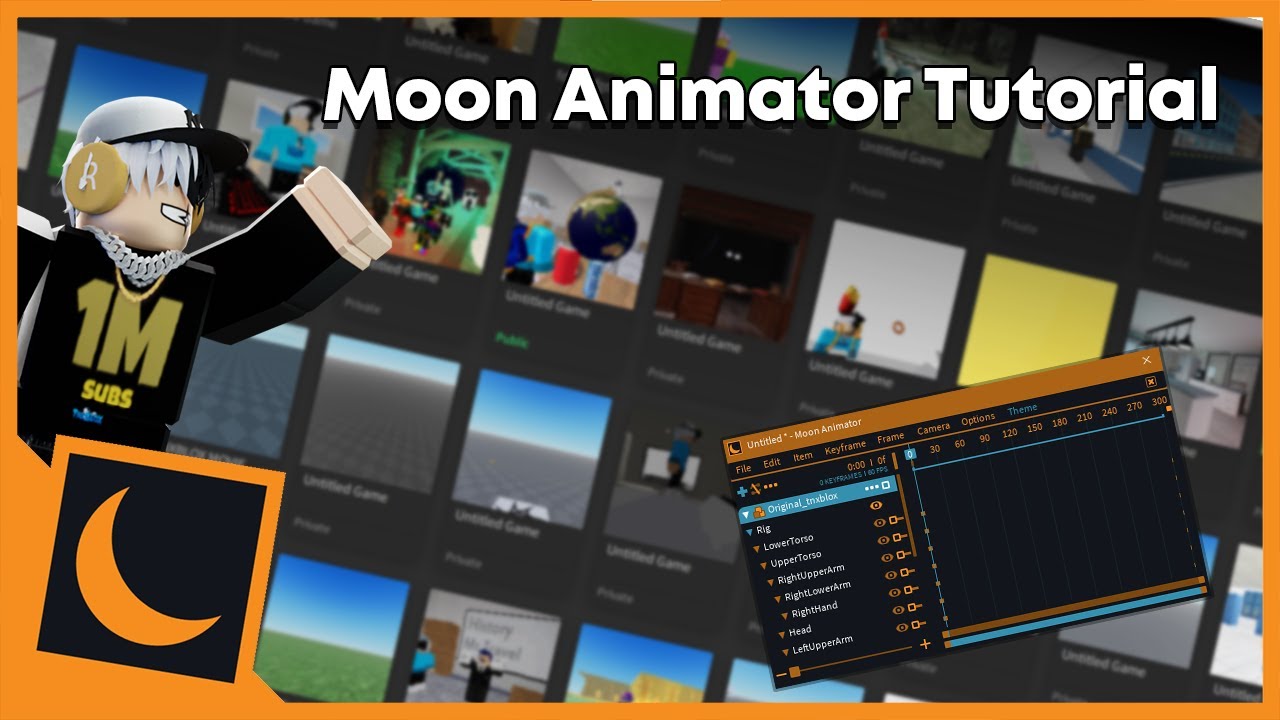


Unlocking Roblox Animation Power With Moon Animator Up To Date 2026 . R15 Animation Tester Play On Roblox NoFilter. Animation Catalog Tester Play On Roblox NoFilter. Animation Catalog Tester Play On Roblox NoFilter. Animation Catalog Tester Play On Roblox NoFilter


Unlocking Roblox Animation Power With Moon Animator Up To Date 2026 . Blender Animation Test Creations Feedback Developer Forum Roblox . Roblox Test Animation YouTube Hqdefault . Roblox Animation To Blender Tutorial YouTube . Animation Test Hub Play On Roblox NoFilter


Roblox Animation Test Youtube Battleborn Turned Gaming Cinematics . Roblox 2026 Soon Roblox Animation Oar2 . Roblox Testing Dummy Animation Combat YouTube . Roblox Animation IDs June 2026 Page 2 Roblox ID Roblox Animation Ids . Unlocking Roblox Animation Power With Moon Animator Up To Date 2026 SL1500


Asset Preview NoFilter. R15 Animation Tester Play On Roblox NoFilter. Roblox NoFilter. In The HRD Toolbar Use The Dropdown To Test And Verify Various Test Animation . Impact Arena Roblox Codes Roblox Press Image 1


Unlocking Roblox Animation Power With Moon Animator Up To Date 2026 . RobloxGo Lag Test 2025 Real Time Stats Insights And Ranking Icon. 2024 Guide To Roblox Animations YouTube . Furry Test Roblox Animation YouTube . TEST ANIMATIONS ROBLOX YouTube